How to create a router
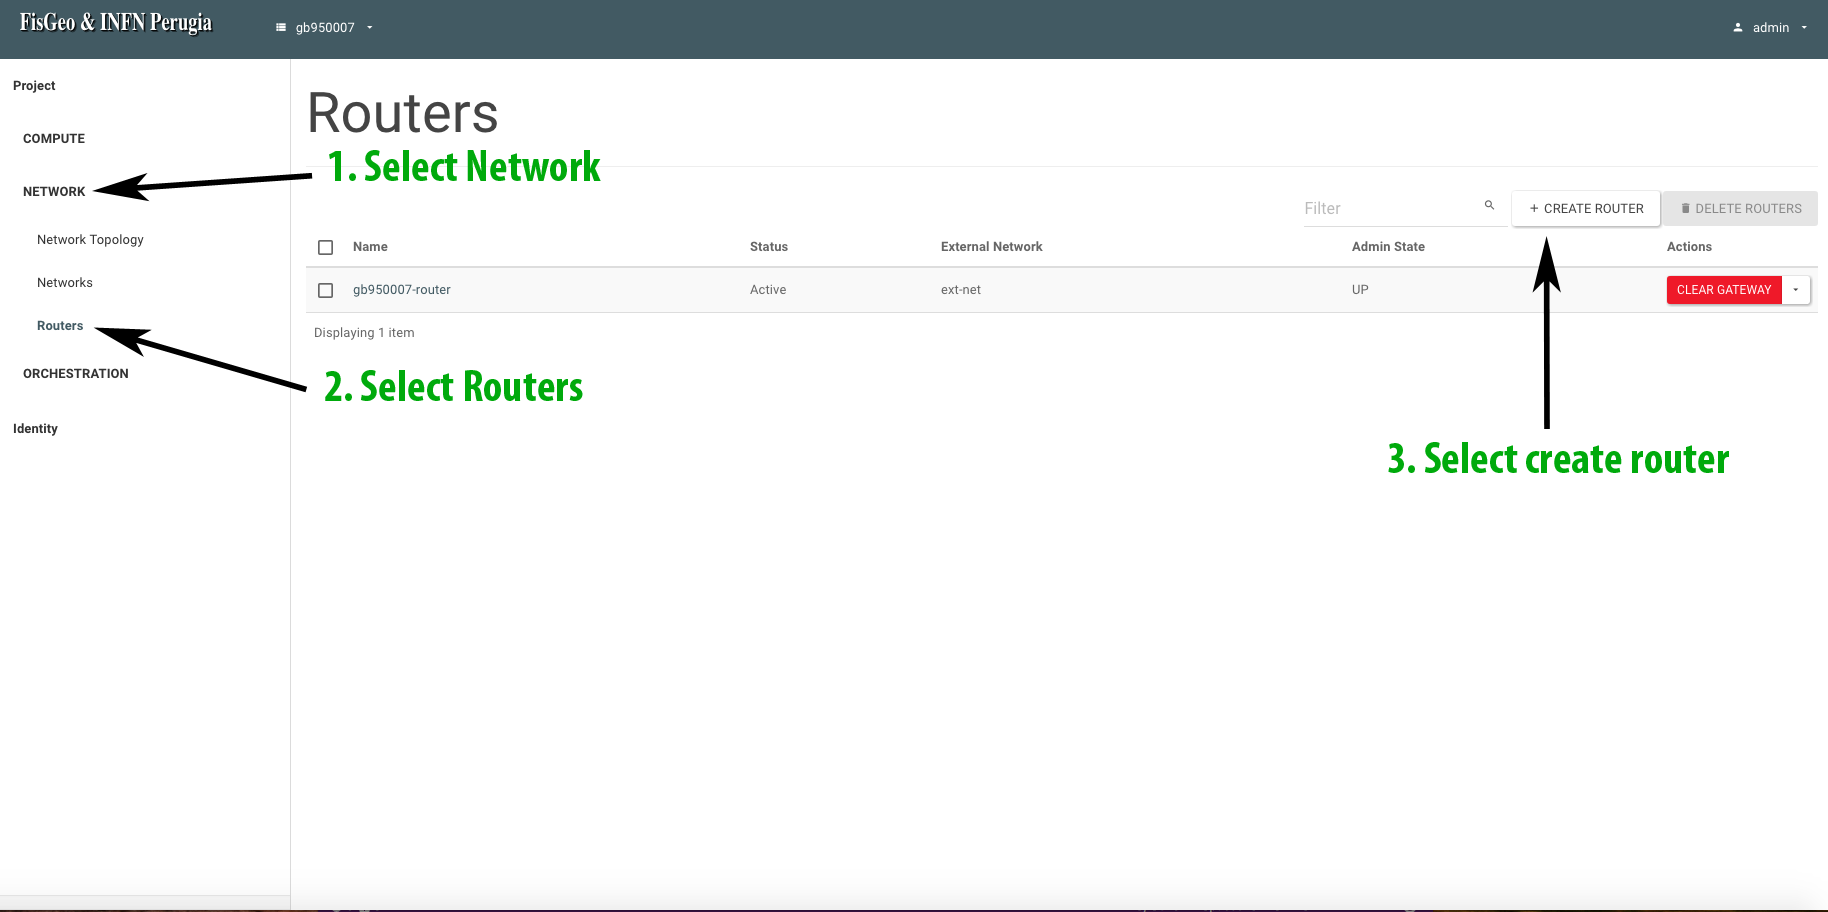
Log in to the Openstack web dashboard and then select the project in which you want to create a router. After creating a network, it is necessary to create a router. So, on the left side of the page, click on Network, then Routers and go to Create router as shown in the following figure.
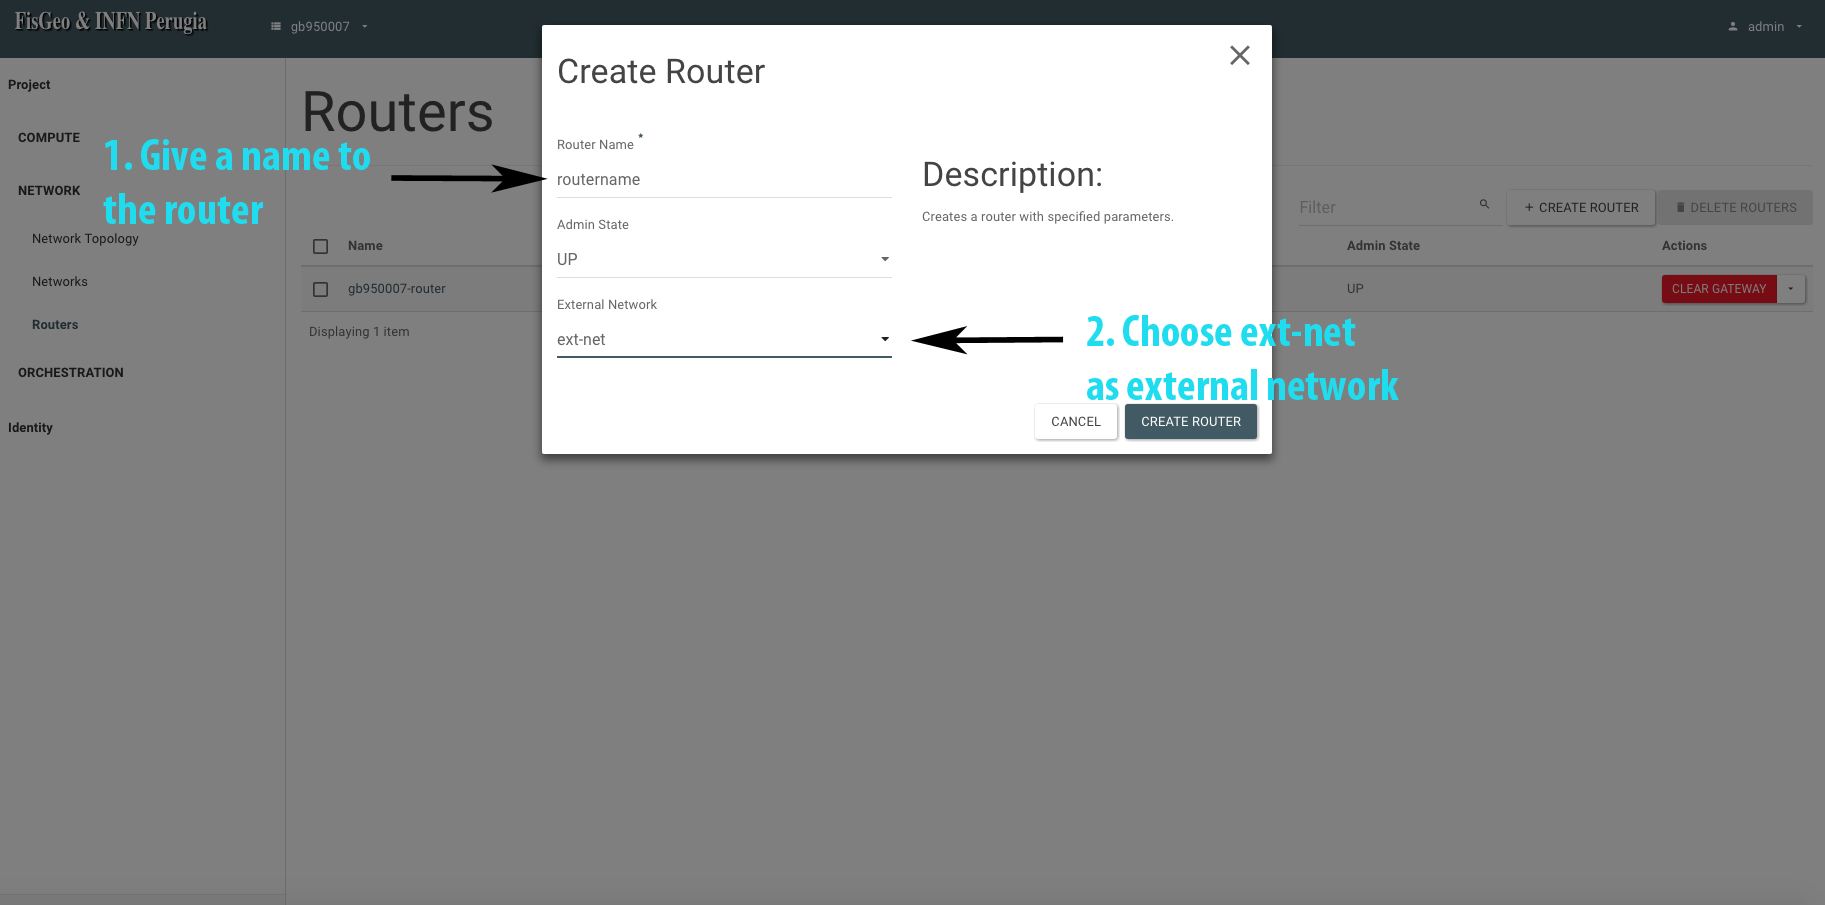
In the new window that opens, under the section Router give a name to the router. Once this is done, select as an external network ext-net and then click on Create router as shown in the following picture.
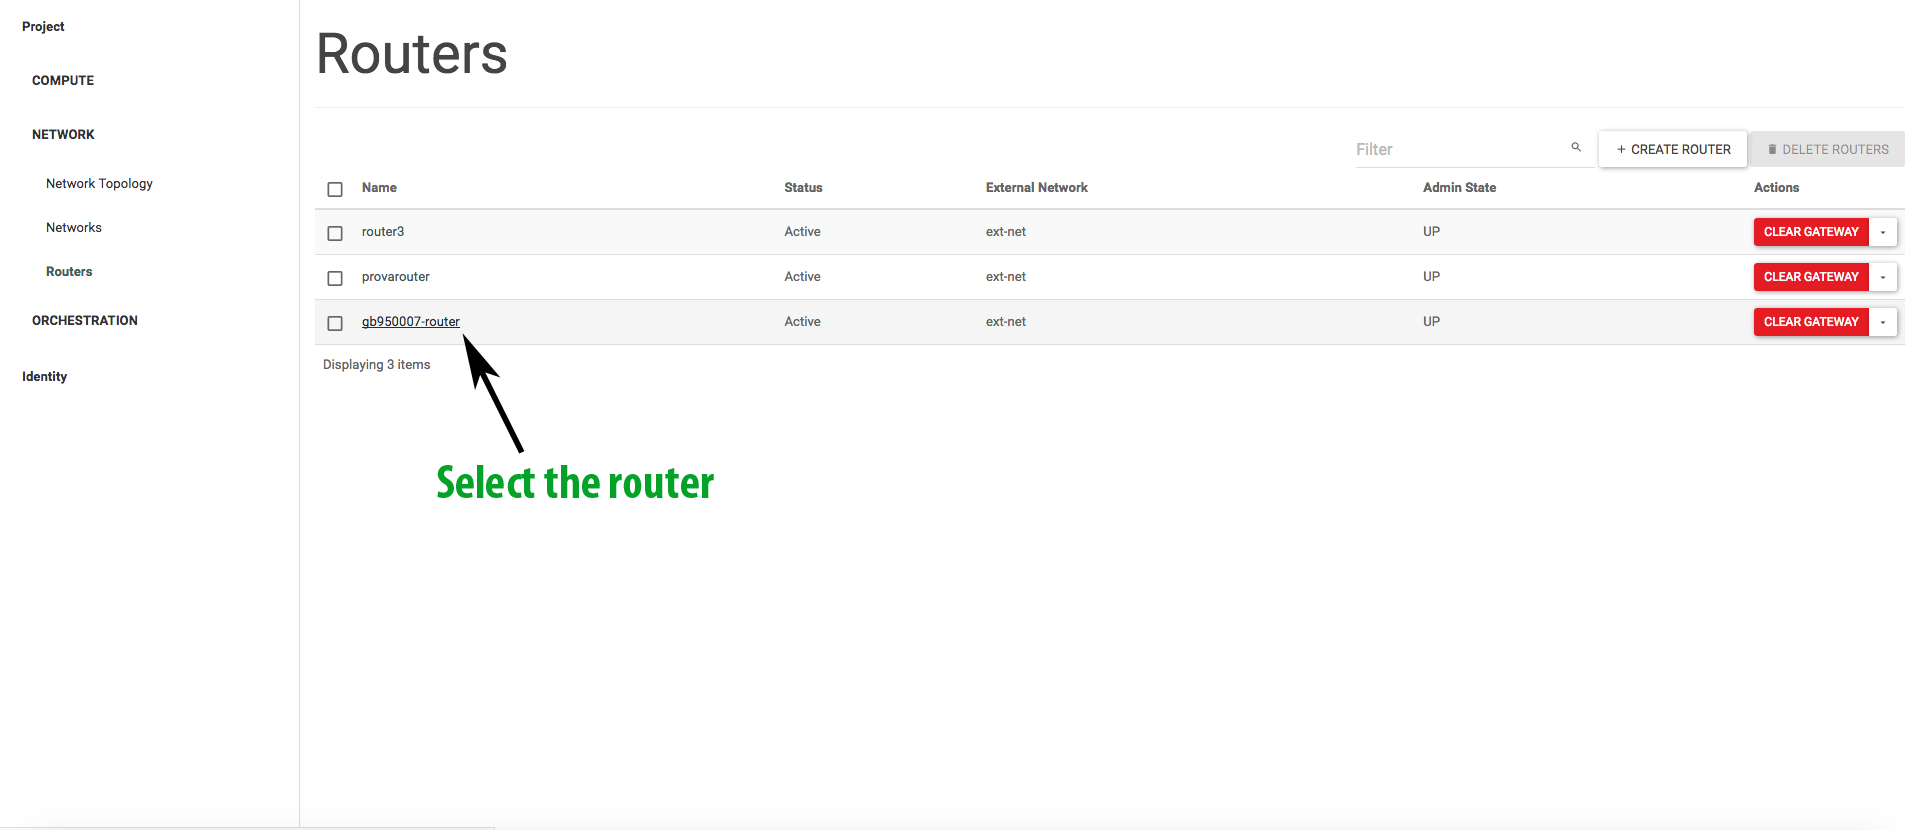
If all went well, we will see our newly created router under the section Network -> Routers
To terminate the router configuration, we need to configure an interface and connect it to the previously created internal network. To do this, go back to the Network -> Routers section and select the newly created router, as shown in the figure
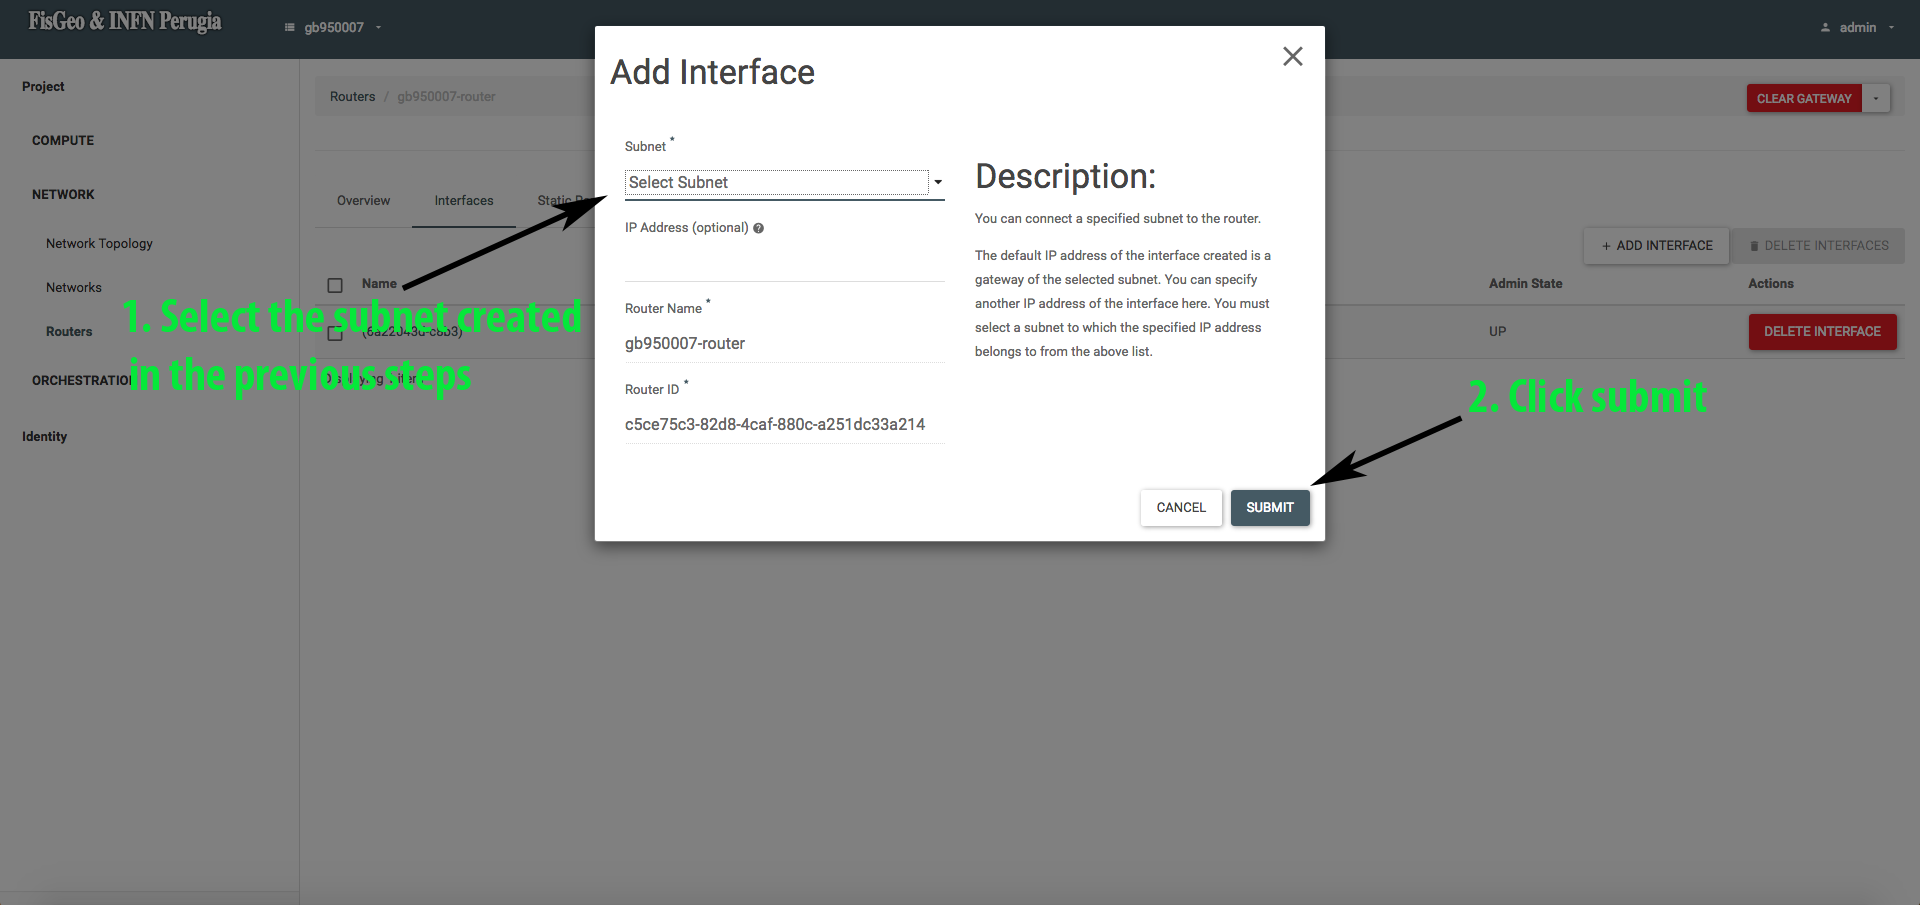
A new window opens and here you select interfaces

Finally, select the subnet created in the previous steps to be connected to the interface of our router.
Having done this, browsing to Network -> Network Topology section you will see a diagram of the network we have just created and configured.